Welcome to EduPublisher!


Terminologies and Basic Features & Functions of Icons in Publisher
What is Microsoft Publisher?
Microsoft Publisher is a desktop publishing program. It is used to design, layout, and create text and picture-rich publications such as:
- Greeting Cards – invitations, Holiday cards or posters
- Calendars – for family, school, work or hobby
- Books – photo albums, yearbooks, addresses or a brochure
Publisher offers excellent control over certain aspects of your publication. Publisher makes it easy to work with documents in a variety of sizes and shapes. It also has a large number of tools to help you arrange and align text, images, and other objects within page margins.
The Ribbon
The Ribbon runs along the top, has all the Publisher tools, and is organized into three parts:
- Tabs – represent a general activity area
- Groups – show related tools (commands) together
- Commands – a button, expandable menu, or a box for entering related information
Click the various Tabs: observe how the Groups and Commands change based on the selected Tab.

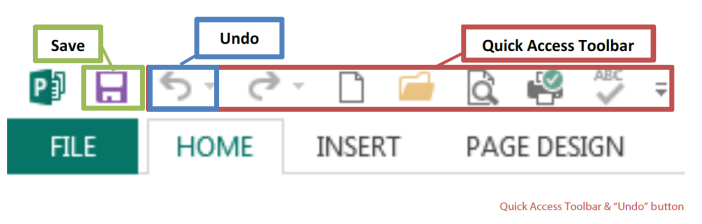
Quick Access Toolbar
The Quick Access Toolbar is above the Tabs and has commands used most often, including "Save".
Place the mouse arrow over each icon (do not click) to see the name and use for each icon. You may customize the commands in the toolbar if you click the black arrow at the end of the toolbar.
The Undo command "takes back" any changes made to the document. For example, type "Undo" in the blank document you have open, then click Undo in the Quick Access Toolbar. Undo keeps track of actions by sequence; if you accidentally erase (change) data in your file, click Undo right away to get it back. On that note, it is important to "save early and save often." (See "Saving Your Work" on page 5.)
File Menu
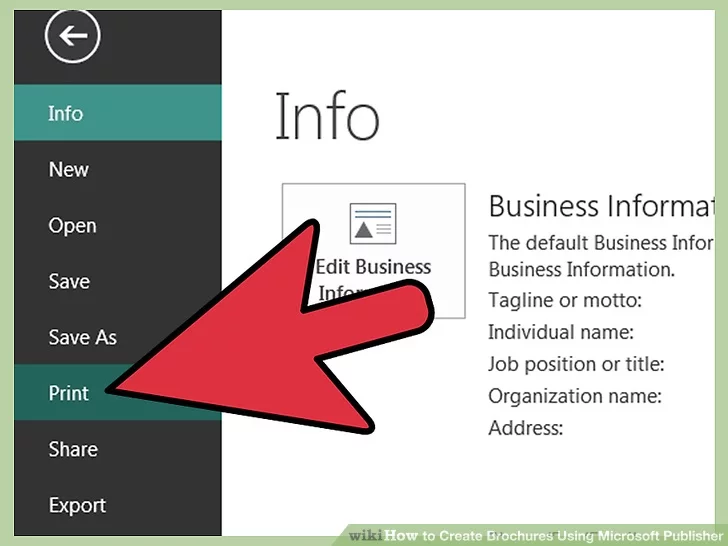
The File Menu contains actions at the file level. Click the green "File" tab to the far left of the tabs. What you'll see is the "backstage" area. From here, you can create a New document, Open an existing one, Save changes to the current document, Save As a different file with a different name, Print the current document, and other options. Click the "back arrow" at the top to exit the backstage area.
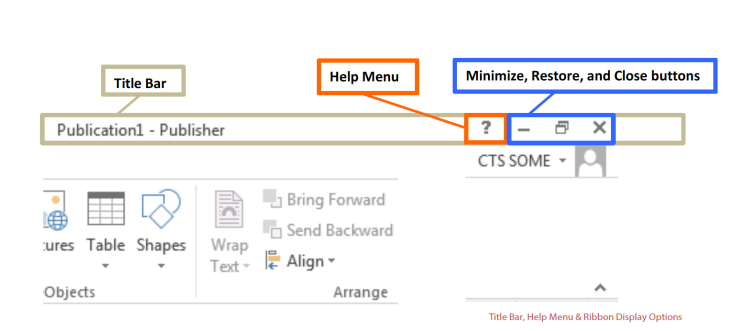
Title Bar, Help Menu, Window Display Options
The Title Bar shows the name of the program and the name (title) of your document. A new document has a temporary title, Publication1, until you "Save As" with a different name. To the far right on the Title Bar is the Help Menu and Ribbon Display options.
The Help Menu has articles on using the software. Not sure how to perform a certain action or where to find a command? Click the question mark icon to browse Help articles, or search for specific topics.
Window Display Options include Minimize (docks window in status bar), Restore (makes window smaller for manual re-sizing or full screen), and Close (closes window and program) buttons.
Take a moment to locate and explore these features in the Publisher program window.
Publisher Organization Tools
Publisher offers many tools to help organize and arrange content in your publication. Here are a few.
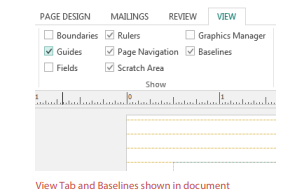
Baselines
Baselines are evenly spaced horizontal lines that can be used to line up text. To show Baselines:
- Click the View Tab.
- Look in the "Show" group.
- Check box next to "Baselines".
Baselines will not print. To hide Baselines, uncheck Baselines box.
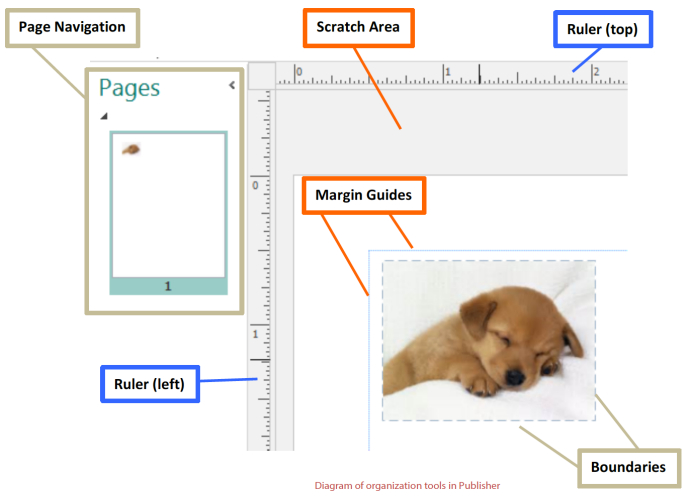
Boundaries
Boundaries are dark blue dashed borders that appear around objects. Viewing object boundaries can be useful to align objects or view text.
Rulers
Rulers are on the left and top of the publication to help line up text, images, and other objects. When an object is selected, a white space will appear on the rulers to show the object's location.
Guides
Guides are thin lines that help to align objects. There are two types of guides:
- Margin guides are blue lines that mark the edges, or margins, of a printable area; they are automatically created when page margins are set.
- Customizable guides are green lines that can be added anywhere in a publication. To add them:
- Left-click and hold the horizontal or vertical ruler.
- Drag the mouse to the publication.
- Release to add the guide to a location.
Page Navigation
Page Navigation is a pane to the left that displays an image of each page in the publication.
Scratch Area
Scratch Area is the grey area outside the white page area. It shows objects or portions of objects located outside page boundaries; anything in the scratch area will not print. You can think of it as a holding space while you decide what to place and how to place it in your publication.
How to use Templates, WordArt, Shapes and Text
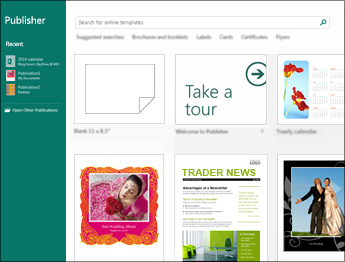
When you open Publisher, you'll see a catalog of templates to choose from. To create a publication, select a template that is most like what you want your publication to be. After you open the template, you can change it to include all the elements—such as colors, fonts, graphics—that you want. In addition to creating a new publication from a template, you can also create new templates that you can re-use without having to re-apply your customizations.
Learn about templates
You can make a template from any publication by saving that publication as a Publisher template file. When you start a new publication by selecting a template, a copy of the template file opens, so that the original template isn't altered by mistake. If you want to make changes to a template, you can open a copy of the template file, make the changes that you want, and then save it again as a template.
You can save time by designing a master publication that reflects your company brand and identity and then saving it as a template. Then, each time you want to create a new version, you can use the template and add only the information that is unique to that version. Using a template for a publication that you regularly produce not only saves time but also ensures quality and consistency of your publications.
Publisher offers designs with dynamic features that make it easy to change the design, layout, colors, and other elements. You can:
- Use one of the publication templates to create exactly the type of publication you want, such as a calendar, newsletter, or postcard.
- Design a publication, customize it to your needs, and then save it as a template.
Find a template
In addition to using the template categories to browse for templates, you can search for templates based on keywords.
For example, if you wanted to create a brochure with a tri-fold format, instead of going to the Brochures category and then browsing through the format options, you could enter tri-fold brochure in the Search box to find all the available brochure templates in a tri-fold format.
WordArt is a gallery of text styles that you can add to your publications to create decorative effects, such as shadowed or mirrored (reflected) text. You can use WordArt to add special text effects to your document. For example, you can stretch a title, skew text, make text fit a preset shape, or apply a gradient fill. This WordArt becomes an object that you can move or position in your document to add decoration or emphasis. You can modify or add to the text in an existing WordArt object whenever you want.
Insert and Delete WordArt
Insert WordArt:
- Select the Insert tab.
- In the Text group, select the WordArt pull-down menu.
- Select from either the Plain WordArt Styles or WordArt Transform Style galleries.
- Type your text in the Edit WordArtText box, select the font, font size, and apply bold or italics, and click OK.
Delete WordArt:
- Select the WordArt object.
- Press Delete.

The WordArt Tools tab enables you to format the WordArt’s text and effects, arrange the WordArt in relation to other objects on the page, and change the size of the WordArt object.

The Text group gives you access to tools for changing the text content, spacing, height, switching between horizontal and vertical, and the text alignment within the WordArt object.
Edit Text
To change the text in the WordArt object click on Edit Text and edit your text in the Edit WordArt Text box.
Spacing
Spacing enables you to adjust the space between characters in your WordArt by using one of the five pre-set formats and using or not using kerning pairs.
- Very Tight: Increases the width of the text to eliminate the space between characters in each word.
- Tight: Increases the width of the text to minimize the space between characters in each word.
- Normal: This is the default selection and allows a normal amount of space between the characters with the text width at normal for the font.
- Loose: Decreases the width of the text to increase the space between the characters.
- Very Loose: Decreases the width of the text to maximize the space between the characters.
- Kern Character Pairs: Kerning deals with pairs of characters that when next to each other appear to be farther apart than other pairs. To see this, create a WordArt object with the text "WordArt test" and turn on and off the kerning to see the difference.
Even Height
This selection will make all letters the same height, both upper and lower case.
WordArt Vertical Text
This tool toggles your WordArt between vertical and horizontal format.
Align Text
Here you can change the alignment of the text in the WordArt object.
- Left Align: Aligns the text with the left side of the WordArt object.
- Center: Centers the text in the WordArt object.
- Right Align: Aligns the text with the right side of the WordArt object.
- Word Justify: Aligns the text with both the right and left sides of the WordArt objects by moving the words in the text.
- Letter Justify: Aligns the text with both the right and left sides of the WordArt objects by moving the letters in the text.
- Stretch Justify: Aligns the text with both the right and left sides of the WordArt objects by stretching the characters.
WordArt Styles group
The WordArt Styles group enables you to change the style of your WordArt, change the color of the fill and lines, and change the shape of the WordArt object. You can preview each of these effects by hovering your mouse cursor over the selection and Publisher will preview the selection in your Publication.
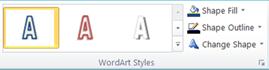
WordArt Styles
Select the style you want from the gallery, to see all the available styles click the More button.
Shape Fill
You can change the color that fills your WordArt text. You can also replace the fill with a picture and adjust the gradient, texture, and pattern of the fill.
Shape Styles
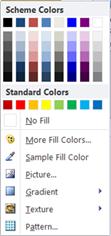
In the Shape Styles group, click Shape Fill and do one of the following:
- To use a color that you have used recently, click one of the colors that is displayed.
- To see more color choices, click More Fill Colors, and then select the color that you want.
- To use a color from anywhere in your workspace, click Sample Fill Color and then click the eyedropper on the color you want to use.
- To use a Picture, Gradient, Texture, or Pattern, select the appropriate menu item.
Shape Outline
You can change the color of the outline of your WordArt text. You can also change the weight of the outline, make the outline dashed, or use a pattern.
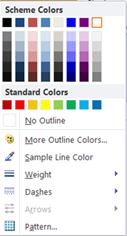
In the Shape Styles group, click Shape Outline, and do one of the following:
- To use a color that you have used recently, click one of the colors that is displayed.
- To see more color choices, click More Outline Colors, and then select the color that you want.
- To adjust the Weight, Dashes, or Pattern of the outline, select the appropriate menu item.
Change Shape
Your WordArt text will follow a defined shape.
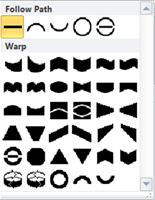
For example you can change the default straight shape to curve upwards by selecting the first Warp option from the gallery:

Shadow Effects group
The Shadow Effects group enables you to format a shadow to your WordArt.

- Click Shadow Effects, and then select the effect you want from the gallery of shadow effect styles.
- To change the color of the shadow, select Shadow Color and select the color options you want.
- To nudge the shadow distance, click the appropriate directional buttons.
- To turn the shadow effect on and off, click the center button.
3-D Effects group
The 3-D Effects group gives you the ability to make your WordArt appear to be three-dimensional.

You can apply a 3-D effect from a gallery of effects. You can also adjust the color, depth, direction, lighting, and surface of the effect. If you hover your mouse over the 3-D effect selection your WordArt will preview the effect.
3-D Effects
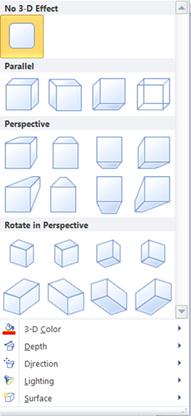
3-D Effects Gallery
Hover over the gallery selections to see the effect previewed on your WordArt. Click to select the effect. To remove all 3-D effects, click No 3-D Effect.
3-D Color
- To use a color that you have used recently, click one of the colors that is displayed.
- To see more color choices, click More 3-D Colors, and then select the color that you want.
- To use choose color from your publication, perhaps in an image on the page, select Sample 3-D Color, move the sample cursor to the color you want to sample and click.
Depth
Select the depth of the 3-D effect, from Infinity to 0 pt.
Direction
Each effect in the gallery has a default direction, but you can use this tool to configure the direction the effect uses to simulate three dimensions.
Lighting
Like Direction, you can use the Lighting tool to change the direction of the apparent light source on your 3-D WordArt.
Surface
You can change the surface of your WordArt from Matte to Plastic, Metal, or Wire Frame.
3-D Tilt
The 3-D tilting tool enables you to exert a fine control over the direction of the 3-D effect by rotating the WorArt left, right, up, or down. The center button turns the 3-D effects on or off.
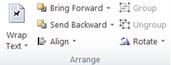
Arrange Group
The Arrange group enables you to set the text wrapping behavior around your WordArt, send the WordArt backwards or forwards relative to other objects on the page, align your WordArt on the page, group or ungroup the WordArt with other objects, and rotate the WordArt.

Size Group
The Size group gives you control over the Shape Height and Shape Width of your WordArt. You can also manually drag the handles of the WordArt object to change its size.
Add a Shape or Symbol
You can quickly add a shape, such as a circle or an arrow, from the Insert tab in Publisher.
- On the Insert tab, click Shapes.
- Scroll through the menu of choices, including basic shapes, lines, block arrows, flowcharts, callouts, and stars and banners.
- Click in your publication where you want the shape to appear, and then click any image handle and drag until you have the size and proportions that you want.
Add text and link text boxes
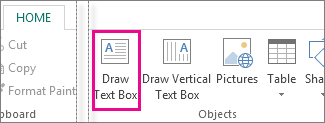
First: Add a text box
- 1. Click Home > Draw Text Box, and drag the cross shaped cursor to draw a box where you want text.
- 2. Type text in the text box. If the text you type is too long for the text box, you can make the text box bigger, or link it to another text box.

Second: Link your text boxes
You can link text boxes so that text flows from one box to another.
- 1. When a text box has too much text, a little box with ellipses appears in the lower right of the text box.
- 2. Create a new text box.
- 3. Click the overflow indicator and your cursor becomes a pitcher.
- 4. Move to the new text box and click.
The overflow text will show up in the new text box. Now as you add text, words flow from one text box to another. If you run out of room in the second box you can link to another text box, and the text will flow through all three boxes.
Formatting and Setup
Change page size, paper size, or page orientation in Publisher
Page size refers to the area of your publication. Paper, or sheet, size is the size of the paper used for printing. Orientation refers to the portrait (vertical) or landscape (horizontal) layout.
About page size, paper size, and landscape/portrait orientation
Any publication layout you select in Publisher includes the page size and orientation used most often for that particular type of publication. You can change the page size and orientation and preview your changes in the Page Setup group on the Page Design tab. You can change the paper size and orientation and preview your changes and the relationship between the page size and the paper size in the Print tab in the Backstage View.
Page size, paper size, or orientation of individual pages
You cannot change the page size, paper size, or orientation of individual pages in a multiple-page publication. To produce a multiple-page publication that contains different individual pages, you must create separate publications for each different paper size, page size, or orientation and then assemble the printed publication by hand.
Change the page size
This procedure sets the size of your publication. For example, you can use this method to select the size of the printed publication to print a poster that measures 22 inches by 34 inches when printed — regardless of whether your printer can handle a single large sheet of paper or whether you will print the poster as a number of overlapping sheets of paper (called tiles).
Choose a page size
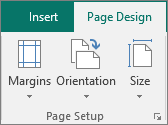
- Select the Page Design tab.
- In the Page Setup group, select Size and click the icon that represents the page size that you want. For example, click Letter (Portrait) 8.5 x 11". If you don’t see the size you want, either click More Preset Page Sizes or click Create New Page Size to create a custom page size.
Create a custom page size
- Select the Page Design tab.
- In the Page Setup group, select Size, then Create New Page Size. Under Page, enter the width and height you want.
Change the Paper Size
The printer that you use determines the paper sizes that you can print on. To check the range of paper sizes that your printer can print on, consult the manual for your printer, or view the paper sizes that are currently set for your printer in the Print Setup dialog box.
To print your publication on sheets of paper that match the publication page size, be sure that the page size and the paper size are the same. If you want to print your publication on a different size of paper — for example, to create a bleed or to print multiple pages on one sheet — change only the paper size.
- On the File menu, click Print Setup.
- In the Print Setup dialog box, under Paper, select the size of paper that you want from the Size list.
Change the orientation of the page
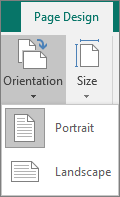
You can change the orientation of your page to and from Portrait and Landscape.
- Select the Page Design tab.
- In the Page Setup group, select the Orientation drop-down menu and select either Portrait or Landscape.
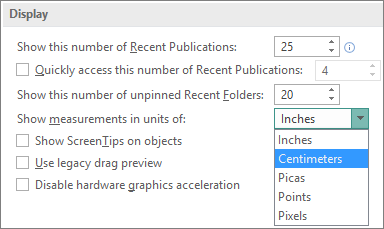
Change the ruler measurements
Need to measure your document in centimeters, not inches? You can change your ruler to centimeters, picas, points, or pixels, along with inches.
Click File > Options > Advanced and scroll to the Display settings. Look for Show measurements in units of, and change the units.
How to Make Certificates, Labels, Brochures, Calendars and more
How to make a Certificate
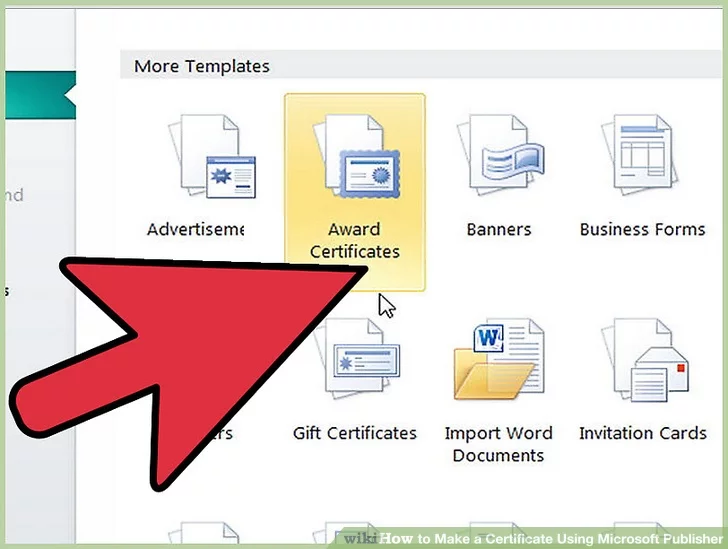
1. Choose the type of certificate you wish to make. When you open Microsoft Publisher, the program displays a list of templates. In Publisher 2003 and 2007, this list is called the "Publication Types" list and is found at the left edge of the screen. In Publisher 2010, this list is called the "Available Templates" list and is found in the center of the screen.
- To make an award certificate, select "Award Certificates" from the list of templates.
- To make a gift certificate, select "Gift Certificates" from the list of templates.
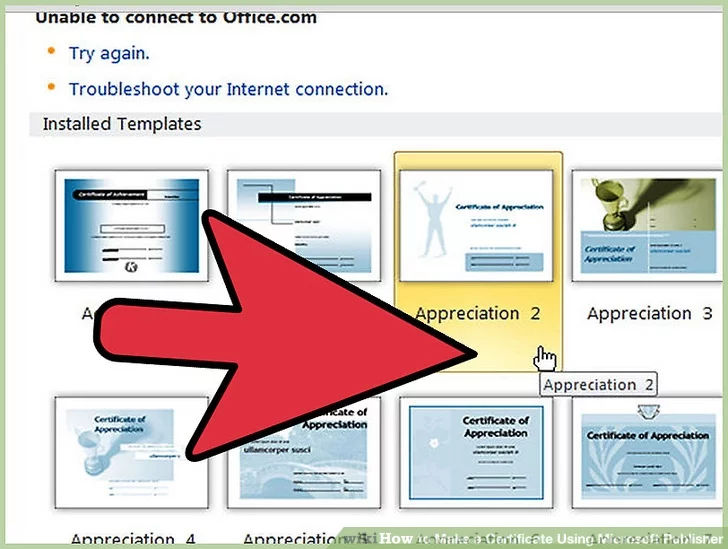
2. Choose the template style that appeals most to you. After you choose whether to make an award or a gift certificate, Publisher displays a list of available templates in each style. Click a template style to see it displayed at the top of the pane to the right of the display of design options.
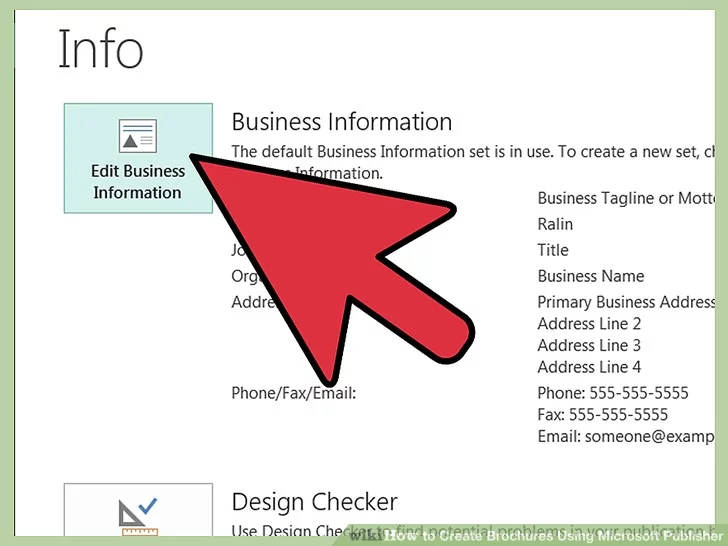
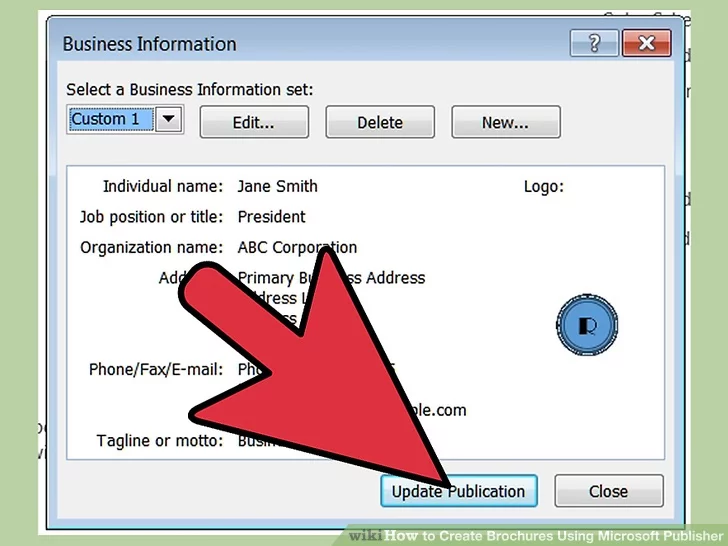
- You can modify the template's appearance with the options in the "Customize" section. Choose one of the options in the "Color scheme:" dropdown to change the colors used in the certificate. Choose one of the options in the "Font scheme:" dropdown to change the combination of fonts used in the certificate. Choose the "Create new" option in the "Business information:" dropdown to add the name of your business and other information to the certificate; you can then save this information to use in future certificates.
- You can also create a certificate from scratch by choosing one of the options in the "Blank Sizes" section. Use these options if you already have design skills and are skilled enough in using Publisher to design your own certificates.
- After you have decided on the template you want and customized it to your liking, either click "Create" or double-click on the template style.
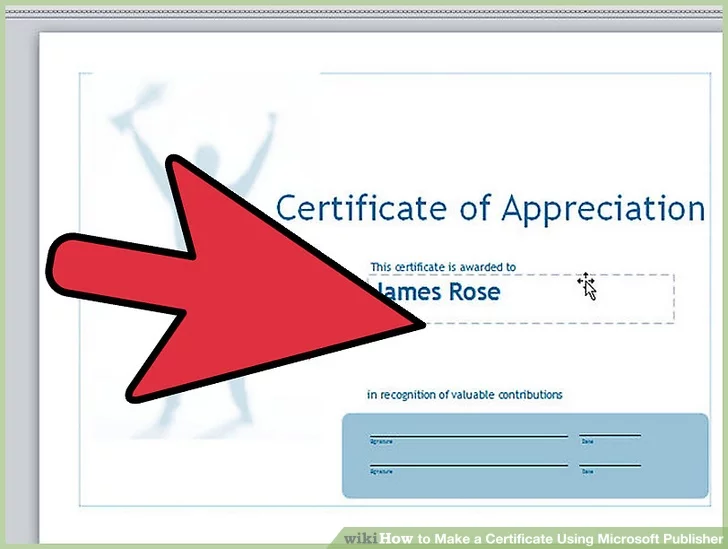
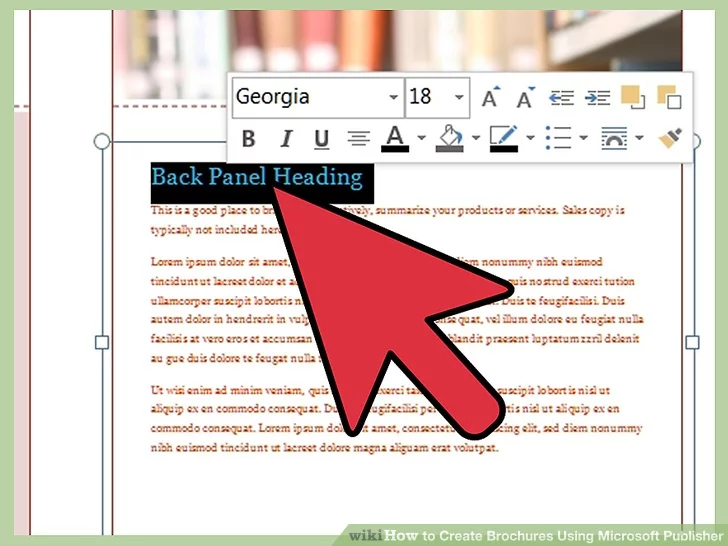
3. Replace any placeholder text and graphics with your own information. To replace any portion of a certificate with your own text or graphics, click on the part of the certificate you wish to modify. That part of the certificate will be surrounded with a set of sizing handle dots. (In Publisher 2010, the tabs of the relevant "Format" toolbars will also appear on the toolbar ribbon.)
- To change the text, click on the placeholder text (e.g., "Name of Recipient") and type the new text. You can let the text automatically resize to fit the text box, or you can control the text size manually. To adjust the text size manually in Publisher 2003 and 2007, select "AutoFit Text" from the "Format" menu and then click "Do Not Autofit". Choose a new font size from the toolbar Font Size list. To adjust the text size manually in Publisher 2010, select "Do Not AutoFit" from the "Text Fit" dropdown button in the "Text" group of the "Text Box Tools Format" ribbon. Choose a new font size from the "Font Size" list in the "Font" group.
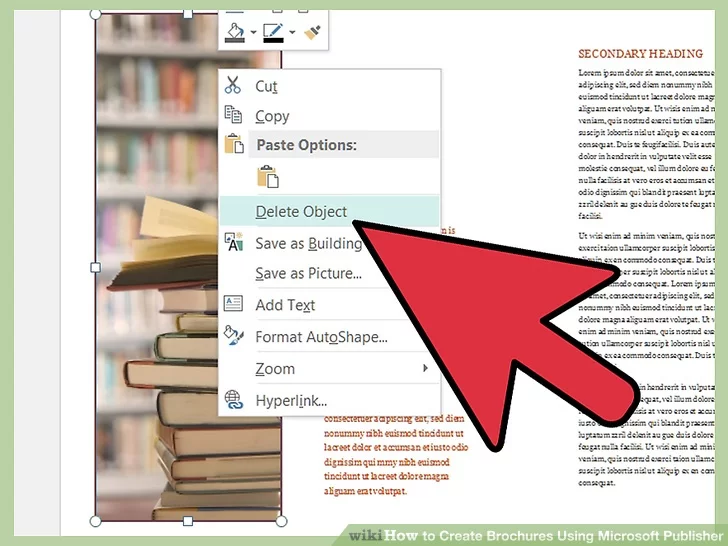
- To change a picture, right-click the existing picture and click "Change Picture" from the popup menu. In Publisher 2003 and 2007, select either "Clip Art" or "From File" to replace the picture with one from either of those sources. In Publisher 2010, select "Change Picture" from the "Change Picture" submenu and then select a new picture using the "Insert Picture" dialog. (This option is not available for graphic images that were created as drawing objects.)
- To change a drawing object such as a line or shape, right-click the existing drawing object and select "Format AutoShape" from the popup menu. Use the options in the "Format AutoShape" dialog to change the shape color, line thickness, and size.
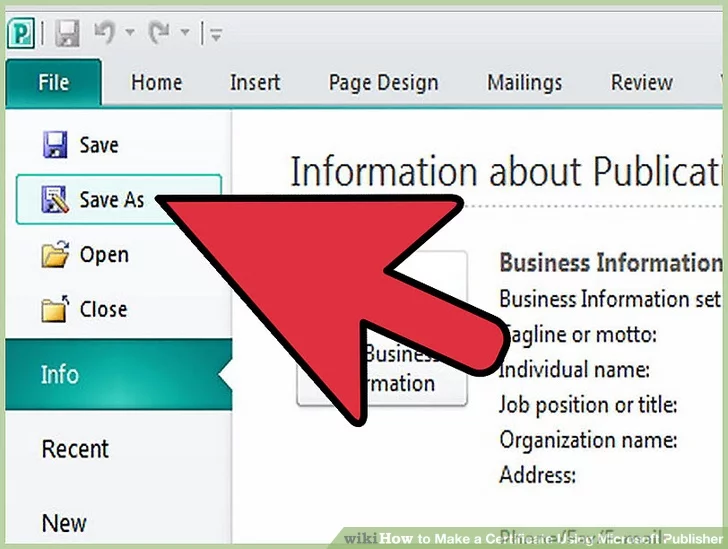
4. Save the file when you're satisfied with its appearance. Once the file is saved, you can use it as the basis for creating new award certificates or gift certificates. Be sure to save variations under their own file names to avoid erasing the original version.
- You can also save an award certificate or gift certificate as a template to create new certificates from. Choose the "Publisher Template" option in the "Save As" dialog to do this.
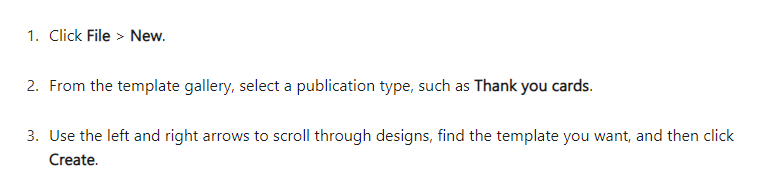
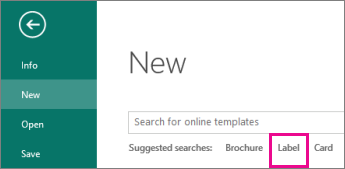
- 1. Click File > New.
- 2. Click Label to find a label template, or type the Avery or other manufacturer stock number in the search box to find more templates online.
- 3. Check the template description to make sure it is compatible with the label stock you plan to print on, and then click Create.
- 4. Type the information that you want on each label.
- 5. Click File > Print, and then click Print again.
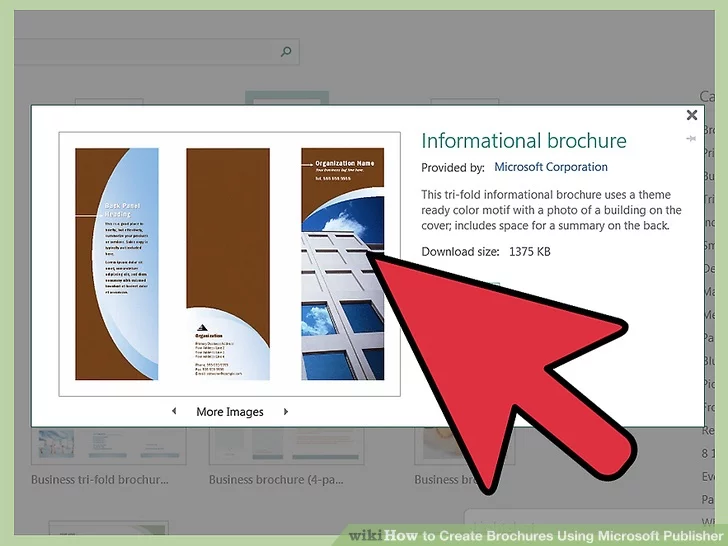
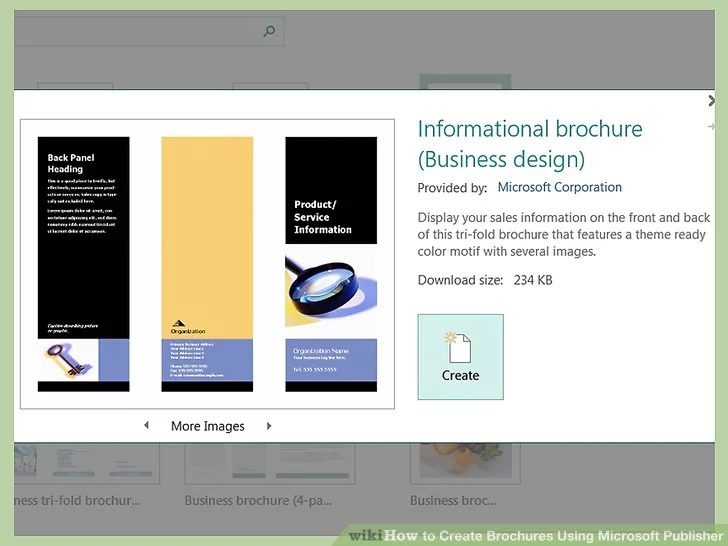
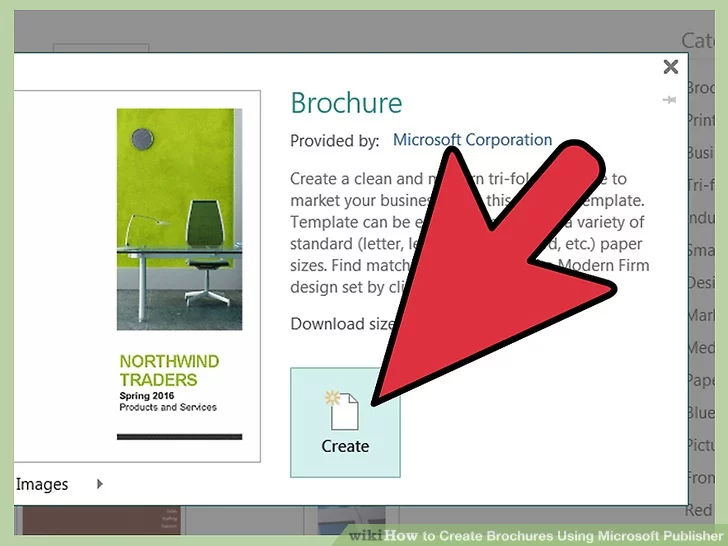
1. Choose a brochure design

2. Choose a panel amount.
Decide whether you want to make a 3- or 4-panel brochure. Select "3-panel" or "4-panel" from the Page size section of the Options section of the task pane.
- Publisher lets you make a 3- or 4-panel brochure design on any of a number of paper sizes. Before deciding on whether to make a 3-panel or 4-panel brochure, you may want to fold a sheet of paper of the size you want to print your brochure on in thirds or quarters to help you decide which design you want to make. (A misprinted document is a good choice for this.)
- Page size options are not available if you choose to make your brochure from a blank size template.
3. Decide whether your brochure is to be handed out or mailed.
If you plan to mail your brochure to prospective customers, allow panel space for a mailing and return address. (You supply the mailing addresses from a mail merge from a Microsoft Excel spreadsheet or a Microsoft Access database.) If you plan to hand it out instead, you won't need to allow panel space for a mailing address, although you'll likely want to have your company name and address on the brochure.
4. Include any necessary forms.
If you're using your brochure to solicit information or orders from your customers, include a form in your brochure to collect that information. The Forms dropdown list offers several options:
- None. Choose this option if your brochure is designed solely to present your business without collecting any information from your customer in return.
- Order form. Choose this option if your brochure is a sales brochure from which customers can order the products described in it.
- Response form. Choose this option if your brochure is intended to present your current products or services and solicit information from your customers about new products, changes to products, or improvements to services they'd like to see.
- Sign-up form. Choose this option if your brochure is a sales brochure selling a service for customers to register for.
- Form designs are not available if you choose to make your brochure from a blank template.
5. Choose a design scheme.

You can add custom colors and fonts to your brochure. Each template comes with a default color and font scheme, but if you wish to use a different color or font scheme, you can do so by selecting the appropriate new scheme. Choose a new color scheme from one of the named color schemes in the Color Scheme dropdown and a new font from the Font Scheme dropdown.
- You can also create your own custom color or font scheme by selecting the "Create new" option from either the Color Scheme or the Font Scheme dropdown.
- If you are producing other marketing materials in Publisher, such as flyers, gift certificates, or special stationery, you should choose the same color and font scheme for all these materials to present a consistent brand identity for your business.
6. Insert your company information.
7. Create the brochure.
8. Replace any placeholder text with your own text.
9. Replace any placeholder pictures with your own pictures.
10. Save the brochure.
11. Print copies of your brochure as needed.
Saving of Outputs
The Ribbon
To make sure you don’t lose your work on a document, you should "save early and save often." Let's start by saving the document you have open in Publisher 2016:
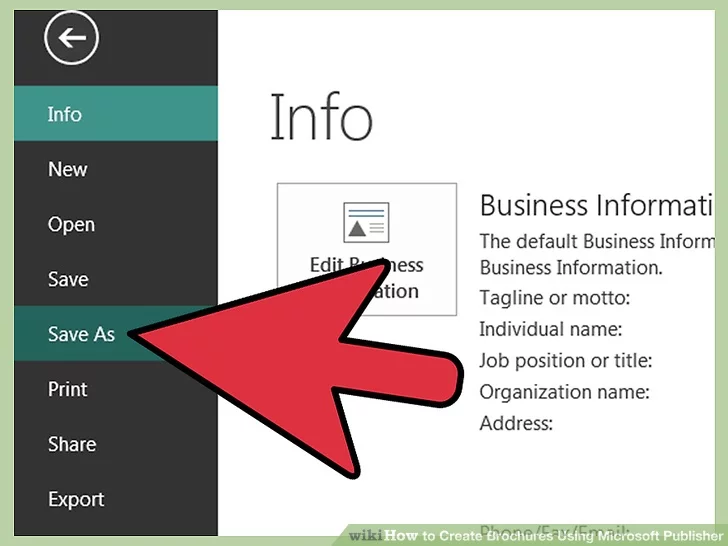
- Click the green File Button near the Tabs. Learn more about "File Menu" on page 4.
- Click Save As. This option is for saving, or naming, a file for the first time. You may create different versions of a file by “saving as” a new name. Learn more in "Quick Access Toolbar" on page 3.
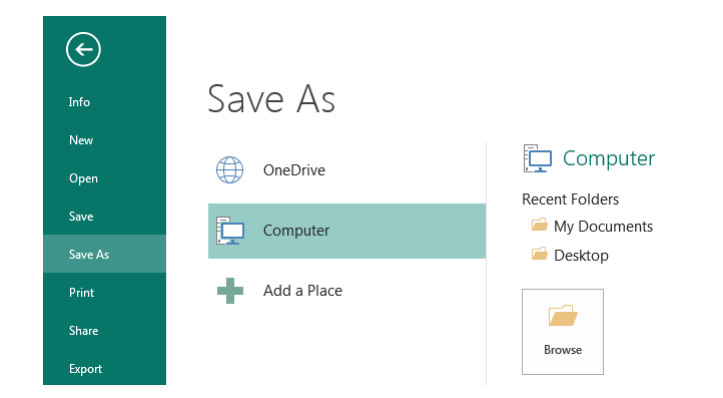
- Click Computer. See TIP below and “Saving With OneDrive” (page 11) for “cloud” storage info.
- Click My Documents folder. On KCLS computers, files saved to “My Documents” folder are erased at the end of your session. Consider a USB drive, or OneDrive for long-term storage.
- Name file “My Practice Document”. Generally, choose a name that is easy to remember.
- Click Save.
Welcome to Pre Assessment Page


Welcome to Admin Page!
Total Number of Pre Assessment Takers
1
Highest Score Achieved in Pre Assessment
15 out of 20
List of Pre Assessment Takers
| Ref # | First Name | Last Name | Score | % | LR No. | Lesson | Date |
|---|
Total Number of Post Assessement Takers
0
Highest Score Achieved in Post Assessment
out of 50
List of Post Assessment Takers
| Ref # | First Name | Last Name | Score | % | LR No. | Lesson | Date |
|---|
Welcome to Post Assessment